Damage types and status effects explained
Which elements you put on your weapon often matters more than raw damage. Learn about damage types, combined elements, status effects, faction weaknesses and critical hits.
This tutorial is only available in English and German for now.
At a glance
- Damage types
- 3 physical, 4 primary, 6 combined
- Weakness
- +50% damage
- Resistance
- −50% damage
- Crit tiers
- yellow, orange, red
01What is it about?
Every hit in Warframe has one or more damage types. Each enemy faction takes more damage from some types and less from others. On top of that, every hit can trigger a status effect that weakens, slows or further hurts the enemy. Once you understand this, the same mods deal a lot more damage.
The most important terms in short:
- Physical damage
 Impact,
 Punch Through and
 Slash. The weapon brings these itself. You can boost them, but not add new ones.
- Elemental damage
 Heat,
 Cold,
 Electricity and
 Toxin. You add them with mods, for example
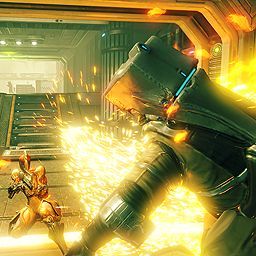 Hellfire.
- Combined element
- Two primary elements on one weapon merge into a new element, like Cold and Toxin into
 Viral.
- Status effect
- An extra effect that triggers randomly on a hit. Which one depends on the damage type.
- Status chance
- The chance that a hit triggers a status effect.
- Critical hit
- A hit with bonus damage. Critical chance sets how often it happens, critical multiplier how strong it is.
- Faction
- The enemy group, for example Grineer, Corpus or Infested. Each has its own weaknesses.
02Physical damage and primary elements
Almost every weapon starts with a mix of the three physical types. The weapon stats show how much of it is Impact, Puncture or Slash. Mods like 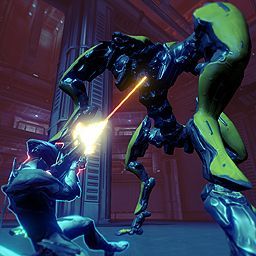 Piercing Hit only boost the matching type. If the weapon has little Puncture, such a mod does little.
Elemental mods are more flexible. They always add a fixed share of the base damage as a new element, even if the weapon had no element before. That is why almost every weapon build has at least one elemental mod. General damage mods like  Serration raise all damage types at once.
| Primary element | Example mod (rifle) |
|---|---|
| Heat | Hellfire |
| Cold | 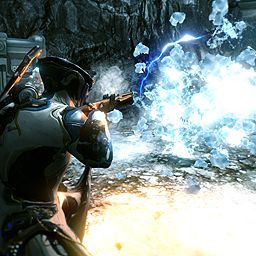 Cryo Rounds |
| Electricity | 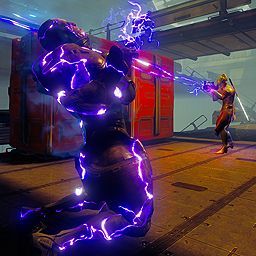 Stormbringer |
| Toxin |  Infected Clip |
03Combining elements
If you have two different primary elements on a weapon, they merge into a combined element. The two primary elements disappear. They no longer deal their own damage and no longer trigger their own status effect.
| Combined element | Made from |
|---|---|
 Blast | Heat + Cold |
 Radiation | Heat + Electricity |
 Gas | Heat + Toxin |
 Magnetic | Cold + Electricity |
| Viral | Cold + Toxin |
 Corrosive | Electricity + Toxin |
The order of your mods decides what combines. The game reads the mod slots from top left to bottom right. The first two primary elements form a pair, the next two form the next pair. An element left over stays on its own.
- 01
Cold, then Toxin
Cryo Rounds in slot 1 and Infected Clip in slot 2 give Viral. - 02
Add Heat
If
Hellfire comes next, Heat stays on its own. Result: Viral + Heat. - 03
Different order
Put
Heat first and Cold right after it, and you get Blast instead, with Toxin left over.
04The most important status effects
Every damage type has its own status effect. Many of them stack: several hits make the effect stronger, and each stack runs out on its own.
| Damage type | What the status effect does |
|---|---|
| Impact | Staggers the enemy. It also becomes ready for a Parazon mercy kill sooner. |
| Punch Through | The enemy deals 40% less damage (up to 80%) and is easier to crit. |
| Slash | Bleed: damage over 6 seconds that ignores armor. |
| Heat | Burns over 6 seconds, makes the enemy panic and strips up to 50% of its armor. |
| Cold | Slows movement and attacks. At 10 stacks the enemy freezes solid for a moment. |
| Electricity | Stuns the target and damages enemies nearby. |
| Toxin | Damage over time that skips shields and goes straight to health. |
| Blast | A delayed small explosion. At 10 stacks or when the target dies, everything goes off at once and hits enemies around it too. |
| Radiation | The enemy gets confused and attacks its own allies. |
| Gas | A gas cloud that damages every enemy inside it. |
| Magnetic | More damage to shields (up to +325%), shields do not recharge. |
| Viral | More damage to health: +100%, up to +325% at 10 stacks. |
| Corrosive | Lowers armor by 26%, up to 80% at 10 stacks. |
05Status chance: how often an effect triggers
- Status chance is how likely a hit is to trigger a status effect. Mods like
 Rifle Aptitude raise it.
- Which effect you get depends on the share of each damage type. If Viral is half your damage, about every second effect is Viral.
- Above 100% status chance, a single hit can trigger several effects at once.
- Multishot (for example
 Split Chamber) does not change the chance per bullet, but gives you more bullets and so more tries.
06Health, shields, armor and faction weaknesses
Enemies have up to three layers of protection. Shields (blue bar) absorb damage first, only Toxin goes through. Armor turns the health bar yellow and lowers damage to health, by up to 90% for enemies. All Grineer wear armor, while normal Corpus and Infested do not. Health is the red bar underneath.
Since Update 36, weaknesses and resistances only depend on the faction. A weakness gives +50% damage, a resistance −50%. The Star Chart shows you the recommended types for every node.
| Faction | Weak to (+50%) | Resistant to (−50%) |
|---|---|---|
| Grineer | Impact, Corrosive | none |
| Kuva Grineer | Impact, Corrosive | Heat |
| Corpus | Punch Through, Magnetic | none |
| Corpus Amalgam | Electricity, Magnetic | Blast |
| Infested | Slash, Heat | none |
| Infested on Deimos | Blast, Gas | Viral |
| Orokin | Punch Through, Viral | Radiation |
| Sentient | Cold, Radiation | Corrosive |
| Narmer | Slash, Toxin | Magnetic |
| The Murmur | Electricity, Radiation | Viral |
| Zariman |  Void | none |
| Scaldra | Impact, Corrosive | Gas |
| Techrot | Gas, Magnetic | Cold |
| Anarchs | Impact, Electricity | Radiation |
07Critical hits and crit tiers
Critical chance sets how often a critical hit happens. The critical multiplier sets how strong it is. Critical chance can go above 100%. Then critical hits get stronger and change color.
| Critical chance | Color | Damage at 2x multiplier |
|---|---|---|
| below 100% | some hits yellow | 2x |
| 100 to 200% | all yellow, some orange | orange: 3x |
| 200 to 300% | all orange, some red | red: 4x |
Each further tier adds the crit bonus once more. Mods like  Point Strike raise the chance,
 Vital Sense the multiplier. Puncture and Cold status also make enemies more vulnerable to critical hits.
08Practical tips for your builds
- Against Grineer: Corrosive hits their weakness and strips armor at the same time. Heat lowers armor even more.
- Against Corpus: Magnetic hits their weakness and tears down shields. Toxin ignores shields completely.
- Against Infested: Heat and Slash are both weaknesses. Normal Infested have no armor.
- For everything: Viral + Heat is a versatile choice. Viral boosts all damage to health, Heat deals damage over time and lowers armor.
- At high enemy levels, like in How to unlock and master the Steel Path, Viral and Corrosive pay off the most. They work in percent, so they stay strong even against huge health and armor values.
How to equip mods and get enough capacity is explained in Modding basics: capacity, Endo, Forma and more.
Frequently asked questions
I am new. Which element should I take first?
Just put an elemental mod like Hellfire in your main weapon, that gives you more damage right away. Once you have a second elemental mod, try combinations like Viral or Corrosive, depending on who you fight.
Why did my Heat damage disappear?
Heat merged with another primary element. Change the mod order or drop one element so Heat stays on its own.
What do the orange and red numbers mean?
Those are stronger critical hits. They show up when your critical chance is above 100% or above 200%.
Where can I see an enemy’s weaknesses?
On the Star Chart for every node, and in the Codex once you have scanned the enemy. Our enemy pages list them too.
Something outdated or wrong? Warframe changes with every update.Let us know
Related tutorials
All tutorials
Modding basics: capacity, Endo, Forma and more
Mods turn a weak weapon into a strong one. Learn how mod capacity, Endo, polarities, Forma, Reactors and Catalysts work together.
How to unlock and master the Steel Path
The Steel Path is the hard mode of the star chart: enemies are 100 levels higher, but you get double resources, Steel Essence and a second set of mastery points.
Getting started: what to do after the tutorial?
You have finished the tutorial and wonder what comes next? Here you find the quest order, the path across the Star Chart, common beginner mistakes and a roadmap for the coming weeks.